Choosing outdoor lighting becomes easier when the purpose is clear. A driveway, loading area, garden path, and building façade need different light patterns. Many buyers compare wattage first, yet beam shape often matters more. A flood light spreads a broad, powerful beam across a wide zone. An area light usually delivers controlled, even illumination for defined spaces. This distinction affects visibility, glare, energy use, and installation height. The practical question is simple: what is the difference between flood lights and area lights?
On real properties, a flood light can brighten a large driveway from one wall-mounted position. However, its intense beam may create harsh shadows near doors or parked vehicles. An area light can provide steadier coverage across a parking lot, walkway, or work zone. Lighting professionals normally assess beam angle, mounting height, lumen output, color temperature, and weather resistance. These details matter more than attractive packaging. Labels can confuse. Measured results matter more.
Good selection also depends on the site’s shape and daily activity. A narrow side path may need precise coverage, while an open yard may benefit from wider distribution. Security goals, pedestrian comfort, maintenance access, and local dark-sky expectations also deserve attention. The wattage shortcut is tempting, but it is incomplete. Even experienced buyers can overlook glare when reviewing specifications indoors. A careful comparison should include a site sketch, fixture spacing, and nighttime testing. The right choice is not always obvious. That uncertainty is useful, because it encourages practical review instead of relying on assumptions.
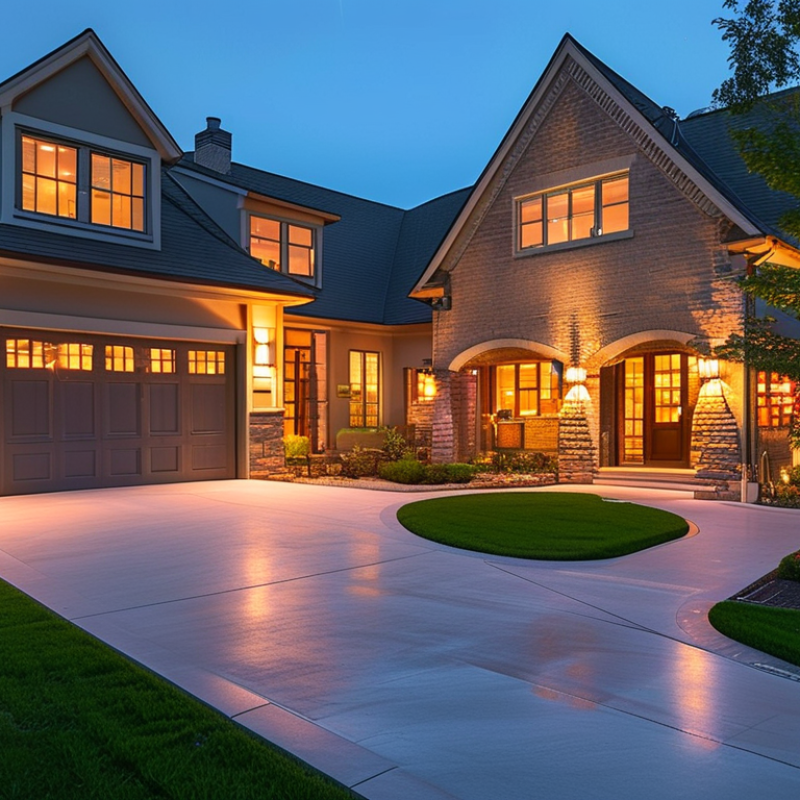
Flood lights and area lights are both outdoor luminaires, but their light distributions differ. A flood light projects a wide, powerful beam across open spaces. It can illuminate building walls, loading zones, sports fields, or large yards from a distance. Area lights usually provide a more controlled pattern. Mounted on poles or walls, they spread light across parking areas, walkways, entrances, and work zones with less spill above the target.
The Illuminating Engineering Society’s Lighting Handbook emphasizes distribution, mounting height, glare control, and uniformity when selecting outdoor lighting. A flood light may reach farther, yet its broad beam can create harsh shadows or shine into nearby windows. An area light often offers better visual comfort because its optics direct light downward and outward. The U.S. Department of Energy reports that LED lighting can use up to 75% less energy and last up to 25 times longer than incandescent lighting, according to its Energy Saver guidance. That efficiency still depends on correct aiming and operating hours. I have seen outdoor projects use excessive brightness simply because the fixture looked powerful on paper. That choice wastes energy and can reduce visibility through glare. Check the beam angle, mounting height, lumen output, and photometric layout before choosing. The specification may be clear. The real site may not be.
Flood lights and area lights both brighten outdoor spaces, but they distribute light differently. A flood light sends a wide, concentrated beam toward a selected target. Its beam may cover a driveway, wall, sign, or loading entrance. Area lights spread illumination more evenly across open ground. They often use a broader optical pattern and mount higher on poles or building walls.
The main difference is control. Flood lights create stronger contrast, brighter surfaces, and darker edges. This effect helps security cameras and highlights specific architectural features. However, poor aiming can cause glare through windows or into a driver’s eyes. Area lights usually produce softer, more uniform coverage. They suit parking areas, walkways, courtyards, and work yards where people need consistent visibility. The light may feel less dramatic, but it reduces harsh shadows.
Check the beam angle, mounting height, lumen output, and weather rating before choosing. A low-mounted flood light can leave distant ground surprisingly dark. An area light mounted too high may waste light beyond the property. In my field observations, small changes in aiming often improve visibility more than installing a brighter fixture. Still, that is not universal. Nearby walls, trees, and reflective pavement can change the result. Testing one fixture after sunset is practical. Watch the ground, nearby windows, and approaching sightlines before final installation.
How do flood lights and area lights differ? The chart compares representative beam spreads commonly used in outdoor lighting applications.
Flood lights use a broad beam to illuminate large or irregular areas. They are suitable for building facades, construction sites, sports areas, landscapes, and security lighting.
Area lights generally provide more controlled distribution for roads, parking lots, walkways, and open spaces where uniform illumination and reduced spill light are important.
Values shown are representative beam-spread midpoints from common outdoor lighting practice. Actual performance varies with the fixture optic, mounting height, aiming angle, and site requirements.
The right lighting pattern depends on how people use your space. Flood lights create a broad beam for walls, loading areas, driveways, and open yards. They can cover large zones from fewer mounting points. However, their light may feel uneven near corners or property edges. I have seen bright centers beside poorly lit walkways. That contrast can reduce comfort and visibility.
Area lights usually distribute light more evenly across parking lots, paths, courtyards, and work zones. Their pattern suits spaces where people move in several directions. Look at the mounting height, beam angle, and spacing together. A wide pattern mounted too low can produce glare. A narrow pattern mounted too high may leave dark gaps. Small details matter.
Measure the space before choosing the fixture type. Mark entrances, steps, vehicle routes, and areas where people pause. Then compare the expected lux levels across the entire surface, not only beneath the fixture. A flood pattern may work well for a long wall but poorly for a pedestrian path. An area pattern may improve uniformity, yet it could waste light beyond the usable boundary. That trade-off deserves a second look. In practice, I would rather accept modest brightness with consistent coverage than create harsh spots and deep shadows. Thermal conditions, maintenance access, and nearby windows also influence the final decision.
How to Choose Between Flood Lights and Area Lights?
What Factors Should Guide Your Lighting Choice?
Your lighting choice should begin with the space’s purpose, not the fixture’s appearance. Flood lights send a broad, powerful beam across walls, yards, loading areas, and driveways. Area lights usually provide more controlled coverage for pathways, parking spaces, entrances, and work zones. Think about what people must see, where they will stand, and how long the lights will operate.
Mounting height and beam angle matter greatly. A flood light mounted low may create harsh glare and dark patches. An area light on a taller pole can spread illumination more evenly. Measure the coverage instead of guessing. I once assumed a brighter fixture would solve poor visibility, but it only increased shadows near the building. That mistake changed my approach.
Weather exposure, energy use, controls, and maintenance should also guide the decision. Choose suitable outdoor protection ratings for rain, dust, and seasonal conditions. Motion sensors can reduce unnecessary operation, while timers support predictable schedules. Check color temperature carefully; very cool light can feel sharp around homes. Warmer light may improve comfort, but it can reduce visual contrast in some work areas. No calculation is perfect. Walk through the space at night, inspect glare from several angles, and adjust the plan before permanent installation. For complex wiring or elevated fixtures, use a qualified electrician and follow local safety requirements.
| Decision Factor | Flood Lights | Area Lights | Recommended Choice |
|---|---|---|---|
| Primary purpose | Designed to deliver strong illumination over a broad area. | Designed to provide balanced lighting across a defined site or work area. | Choose based on whether maximum coverage or uniform illumination is the priority. |
| Typical beam angle | Typically uses a wide beam, often approximately 90° to 120°, depending on the optic. | Often uses a controlled forward or asymmetric distribution, commonly around 40° to 90°. | Use flood lights for broad coverage; use area lights when light needs to be directed more precisely. |
| Coverage pattern | Broad and generally symmetrical, which may create more spill light outside the target area. | More controlled and often asymmetric, helping distribute light across roads, walkways, and site boundaries. | Select area lights where glare control and efficient light placement are important. |
| Mounting height | Suitable for low, medium, or high mounting when a large illuminated zone is required. | Commonly installed on poles, walls, or building perimeters for planned site lighting. | For pole-mounted layouts and perimeter lighting, area lights are often easier to aim efficiently. |
| Illumination uniformity | Can produce bright centers and darker edges if spacing, aiming, and optics are not carefully planned. | Generally better suited to achieving consistent light levels across a planned area. | Choose area lights for parking lots, pedestrian routes, and work areas requiring even visibility. |
| Glare and light spill | Higher risk of glare or spill light when aimed toward nearby buildings, roads, or neighboring properties. | Usually offers better control through shielding, cutoff optics, and directional distribution. | Choose area lights near homes, public roads, property lines, or locations with strict glare limits. |
| Common applications | Building facades, sports areas, construction zones, yards, loading spaces, and security illumination. | Parking lots, streets, pathways, campuses, industrial sites, and outdoor work areas. | Match the fixture to the geometry and function of the space rather than using wattage alone. |
| Light output | Available in a wide range of outputs; higher output does not automatically mean better coverage. | Output is selected according to mounting height, spacing, target illuminance, and distribution pattern. | Compare delivered lumens and photometric layouts instead of comparing watts alone. |
| Energy efficiency | Can be efficient when broad, high-intensity coverage is required, but spill light may waste energy. | Can reduce wasted light when optics direct illumination only where it is needed. | For large planned sites, area lights may provide better lighting efficiency per usable square metre. |
| Color temperature | Common choices range from warm white around 2700–3500 K to neutral or cool white around 4000–6500 K. | Often selected in the 3000–5000 K range for outdoor visibility and visual comfort. | Use warmer temperatures for comfort-sensitive areas and neutral white for general outdoor visibility. |
| Weather resistance | Outdoor models should have an appropriate IP rating, such as IP65 or higher, for dust and water protection. | Outdoor models should also be selected according to exposure, installation location, and required IP rating. | Verify the complete fixture rating and installation requirements rather than relying on product category alone. |
| Controls and automation | Works well with motion sensors, photocells, timers, and security systems for event-based lighting. | Works well with photocells, dimming systems, schedules, and smart outdoor lighting controls. | Choose controls according to operating hours, occupancy, safety needs, and maintenance access. |
| Best overall fit | Best when powerful, wide-area illumination or security visibility is the main goal. | Best when consistent, directional, and low-spill illumination is needed across a defined site. | Base the final decision on photometric performance, mounting conditions, glare limits, energy use, and total installation cost. |
Note: Beam angles, lumen outputs, mounting heights, and IP ratings vary by fixture design. Always confirm the manufacturer’s photometric data, local lighting requirements, and site conditions before installation.
Installation and positioning often matter more than the fixture type. A flood light suits wide, irregular spaces, while an area light gives more controlled coverage. Mark the target zone at night. Then place the fixture high enough to reduce direct glare. Aim flood lights downward, not toward windows, roads, or neighboring properties. Area lights usually work better at consistent mounting heights. Their spacing should create overlapping pools of light.
The Illuminating Engineering Society’s RP-8 guidance emphasizes uniformity, glare control, and careful placement in outdoor lighting design. The U.S. Department of Energy reports that LED systems can use at least 75% less energy than incandescent lighting. That saving disappears when lights are aimed poorly or left on unnecessarily. Use a photometric plan when the site is large. It can reveal dark gaps that a quick visual check misses. I once trusted a simple sketch. It looked fine, but the far walkway remained dim.
Tips: Measure mounting height, beam spread, and setback before drilling. Install adjustable brackets for final aiming. Keep light away from bedrooms and traffic sightlines. Use weather-rated connections and sealed cable entries. Turn off power before wiring, and hire a qualified electrician when required. Check the manufacturer’s installation instructions and local electrical rules. Recheck the site after rain or landscaping changes. Small trees can block a beam surprisingly fast.
A flood light sends a wide beam toward a selected target. An area light spreads softer illumination across open ground.
It can brighten a driveway, wall, sign, or loading entrance. Its stronger contrast can also highlight building details.
Area lights suit parking spaces, walkways, courtyards, and work yards. They reduce harsh shadows across larger surfaces.
Incorrect aiming may create glare through windows or into drivers’ eyes. It can also leave distant ground unexpectedly dark.
Mount fixtures high enough to reduce direct glare. Aim flood lights downward, away from roads, windows, and neighboring properties.
Keep mounting heights consistent. Space fixtures so their overlapping light pools remove dark gaps along paths.
Measure beam angle, mounting height, lumen output, setback, and weather rating. Adjustable brackets help with final aiming.
Not always. Small aiming changes can improve visibility more than extra brightness, though nearby trees and walls can alter results.
Test one fixture after sunset. Inspect the ground, nearby windows, and approaching sightlines.
Turn off power before wiring. Use weather-rated connections and sealed cable entries, then follow local electrical requirements.
Flood lights and area lights are both useful outdoor lighting solutions, but they are designed for different coverage needs. Flood lights produce a broad, powerful beam that spreads across large or irregular spaces, making them suitable for driveways, yards, building exteriors, and security-focused applications. Area lights generally provide more controlled, even illumination for defined zones such as walkways, entrances, parking areas, and workspaces. Understanding what is the difference between flood lights and area lights can help you select the right pattern and brightness for your space.
When choosing between them, consider the size and shape of the area, the desired lighting range, mounting height, brightness, color temperature, energy use, weather resistance, and whether glare control is important. Installation should place the light at an appropriate angle and height to minimize dark spots, excessive glare, and unwanted light spill. A careful assessment of the environment and intended purpose will help ensure safe, efficient, and comfortable illumination.

Lume Light